FREQUENTLY ASKED QUESTIONS
-MISSING INTERNAL STRUCTURE WITH PRUSALICER / BAMBU STUDIO
Reason: The parameter "slice gap closing radius" is 0,049 mm by default. In some of our models we use smaller gaps so the software will erese this material.
Solution: Reduce the value up to 0


Prusaslicer
Bambu studio
-MISSING INTERNAL STRUCTURE WITH CURA VERSION 5.3+
Reason: The parameter "Print thin wall" is disabled by default. That erese many internal structures.
Solution: Enable "Print thin wall" option and define the parameter "Minimum feature size" as 0


-INTERNAL STRUCTURE DOES NOT ATTACH TO THE SKIN
Reason1: Slicer is increasing the nominal gap.
Solution: Make sure that in Cura you are using surface mode: Normal.

Reason2: Firmware or slicer is using a high linear advance (K-factor) value. This setting reduces the flow in the corners to remove the excess of material in those places, but if this value is not properly adjusted and is too high, it will cause an undesired gap. The main problem here is that in most of the cases there are several places where this setting can be applied and in most of the cases the user is not really aware of that because the slicer/printer is applying this by default.
PRESSURE ADVANCE VALUE TOO HIGH
PRESSURE ADVANCE NOT USED


Solution1: In Bambu Studio. Lower the K-factor value to 0.
Here you can find more information about this process

-Alternatively you can also adjust the K-factor here. (This option is not available for all the printers)

-Once you print a plate, do not click "Flow Dynamic Calibration," as this will overwrite the previously defined K-factor value.

Solution2: Do not use any pressure advance setting at your slicer. The best way to get rid of linear advance effects is to include the command "M900 K0" or "SET_PRESSURE_ADVANCE ADVANCE=0.00" at the end of the Custom Start G-code box (note: be aware that despite this note is added, in some cases the printer can use pressure advance anyway)
EXAMPLE IN PRUSASLICER
EXAMPLE IN CURA


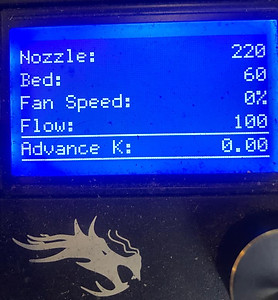
Solution3: In some printers you can adjust the K-value directly in your printer. Turn the value down up to 0

-REMOVED HOLES AT BOTTOM LAYERS WITH CURA VERSION 5.3+
Reason: When you click "spirilize outer contour" bottom holes are removed by default
Solution: Disable "Remove all holes" option.

